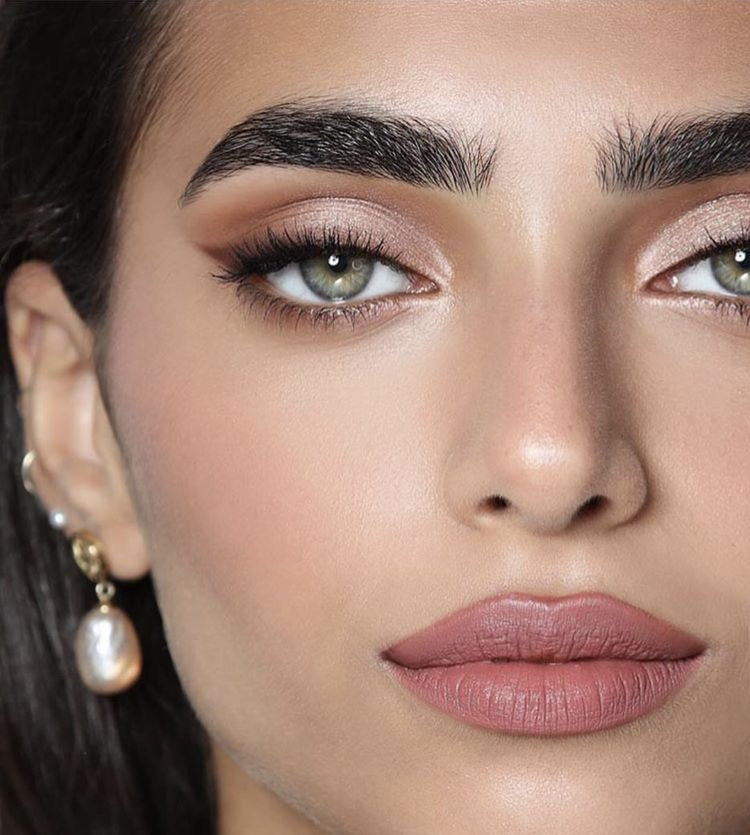
How To Fake Thicker Brows

'Eyebrow people' don't mess about, when it comes to finding the products that will help perfectly shape, sculpt and brush out their brows. And they are right to set the bar high; a good brow product has to do so much more than, say, a lipstick. The perfect product has to glide on easily and be delicate enough to correct, or exaggerate individual hair strands, all while providing a natural-looking finish.

So, we get it, the quest for thick, natural-looking brows doesn’t come easy and it’s often hard to figure out what products will make you look more like a young Brooke Shields and less like Martin Scorsese. But good news, you don’t have to go to beauty school, to be an expert in doing your brows.
You really only need a few things:
Eyebrows, good grooming tools and patience (which is key when going for a less-is-more approach).

To help guide you through, we’ve rounded up our top tools, to help you achieve a clean, (slightly) exaggerated, but still natural-looking version of what you already have.
1. Prep the brows

We recommend giving brows a quick massage with Castor oil, before you start the rest of your routine. Not only is it relaxing and will help with tweezing later; but if you have patchy eyebrows, castor oil it's fantastic for stimulating hair growth.
Step 2: Brush up

Next up you want to get all your hairs going in one direction in order to assess what shape you’re working with.
Go in with a small brow gel (or brush if you'd like a little more wiggle room!) like this one from Benefit which will really get into the tiny parts of the brow; giving it that elusive messy, feathered look. This will also allow you to see what gaps need filling in.
Step 3: Define below the arch

Lightly define your arch, by tweezing any stray brows, to help keep the brow area looking neat and redefine your shape. We recommend leaving the top of the brow untouched, in order to create that really natural feel. If you’re struggling to find a great pair of tweezers, this one from Bobbi Brown is by far the best. Small and sharp, it can get just about anything and is particularly incredible for tidying up any short, pesky hairs.
Step 4: Fill in

Filling in is a bit of an art form. Find the start of your brows (closest to your nose,) and start drawing short, hair-like strokes up. Follow your shape all the way to the brow tail, paying attention to any places you have gaps or sparser hair.

There are so many awesome brow fillers to choose from, but you can’t beat the classic Brow Wiz from Anastasia, or Benefit’s Precisely My Brow, which are both easy to apply thin enough to create the illusion of individual hairs.
Step 5: Highlight

To finish off, highlight your brow bone. Sweep a little luminiser right under your eyebrow - to make your brows look instantly cleaner and more striking. We love using the Pat McGrath Mothership V (in Skinshow Divine Glow) for nights out.

The RMS Living Luminizier is perfect for low key days, thanks to its natural, glossy sheen, that isn't too sparkly.